Two kids in one room

March 23, 2012

I recently helped a mom of three organize a bedroom for two of her boys who had just moved in together to make room for their new baby brother to have his own nursery. Making a bedroom for one into a room for two can feel a little overwhelming – especially if you think the space is small to begin with.

This room was plenty big enough for the furniture that the family already had – a twin bed, a convertible crib, a large dresser for the boys to share, and a small bookshelf.

The furniture all fit inside the room perfectly – around the outer wall perimeters, but all of the nooks and crannies (drawers, shelves, and closet space) was either underutilized or overflowing.  So we made a few adjustments by categorizing like items together, putting often accessed toys and games at floor level for little hands to reach, and we found a place for everything – with room to grow!

The convertible crib that the family already owned had built-in storage – an added bonus! Because the pull out storage drawer is not accessible when the crib side is lowered, we put extra blankets and linens into it – things that aren’t frequently used. A dual-purpose piece of furniture like this is a great thing to consider when outfitting a kid’s room.

Search Results for "crib with storage drawer"

When we were cleaning out the closet, we found a collection of adorable small storage boxes that the family had received as a gift, tucked away in the back and forgotten about because no one felt sure about where or how to use them.  We creatively rearranged some books and displayed the storage boxes on the bottom of the book shelf so that the kids could use them to stash their favorite plush toys and knick knacks.

Kids' bookshelf

The boys love being able to pick out bedtime story books on their own!


Holidaze

December 30, 2009

I’ve been absent for a bit – but I figured I needed to get a new post in before the end of the year. We’ve been waiting on some deliveries: new windows, new siding and new roofing materials. I’m running out of patience. Yes, I know a project of this scale takes time, but I want it done yesterday.

The silver lining? Ayesh and I found our dining table. I’m in love with it. I am NOT going to post a photo yet, just to share the sense of suspense 😉 I will say however, this table is really cool. It’s old reclaimed wood that has wonderful character with a modern flair.

Here’s a couple of photos though: we’ve been taping out our space. we have outlines of where the kitchen cabinets, island and ow new table will go. we’ve placed the fireplace, upstairs closets and even our existing furniture in order to determine electrical conduit and junction boxes.


Share


Floorplanner fun

November 23, 2009

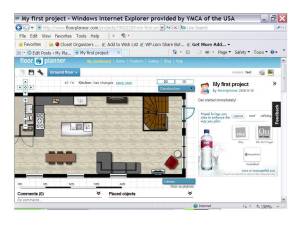
After searching and searching, I found my newest, most favorite tool on the web.  For anyone planning out a new space, reconfiguring a remodel, or simply inspired to move furniture around, I recommend checking out floorplanner.com.  

This FREE online resource is super easy to learn to navigate.  After only a couple of hours, I have a nearly complete draft floorplan of my ground floor.

Ground floor in 2D

I’ve been using graph paper, pencil and ruler for the past week, trying to accurately draw out the first floor so that Ayesh and I can really start to get down to the business of designing our kitchen, determining furniture placement (and thus junction boxes for the dining room chandelier, for instance), and figuring out electrical wiring needs.  I’ve used Better Homes & Gardens’ Arrange-A-Room tool before, also FREE, and although it is a good tool for very simple furniture arranging, it does have limitations in terms of multi-room design and customization.

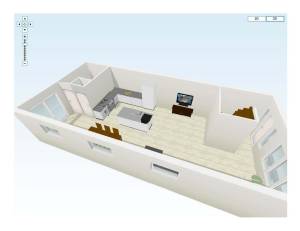
Ground floor in 3DAlternatively, there are so many great things about the floorplanner tool.  You can split walls, create arches, insert any number of different kinds of windows and doors, as well as stairway configurations, and this is the first tool I’ve found where you can design in 2D and then view your plan in 3D from a whole 360 degree of angles.
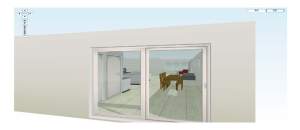
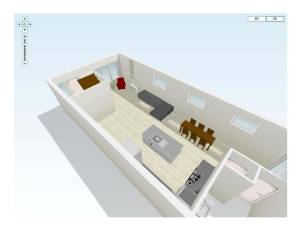
Ground floor in 3D

I also love that I can customize many of the finishes for the pieces that I select and insert into the basic frame.  For example, Ayesh and I are considering a white-washed hard wood floor look.  I was able to select a wide-plank hardwood and customize the color to a look close to one we are thinking would look cool.  Additionally, knowing that we already have a number of pieces of furniture, I plugged in the dimensions for several of those (like the couch, seen below) and was able to place it for a relatively accurate sense of what the space would look and feel like.

Ground floor in 3D

You can also adjust the elevation for pieces, like a wall-mounted television, for example, or kitchen upper cabinets (which I’m still figuring out exactly how to create) and the television, which we want to mount to the wall opposite the couch.

So much fun!

Share


New layout taking shape

November 4, 2009

Saturday was a beautiful, sunny day and was perfect for visiting the house and taking some new photos.  Walking into the house it didn’t seem that too much was different other than the appearance of a new pile of lumber inside, but heading upstairs to the second floor was a completely different story.  Pun intended.

Since Wednesday, when the old chimney was torn out and all the old framing removed, new framing has started going up, outlining each of the new rooms.

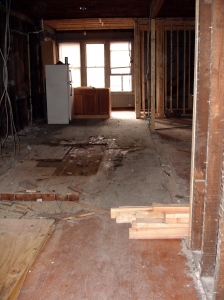
Long view of first floor

Chimney holes in floor are patched

The holes in the floor where the chimney used to be are now patched and a new support beam runs the length of the first floor ceiling now, supporting the central line that runs from the front of the living space to the back bathroom that now has a built-in closet framed out.

Upstairs, where just a few days ago was big empty space is now brand new framing, outlining the beginnings of new rooms in a new layout.

Second floor with new framing

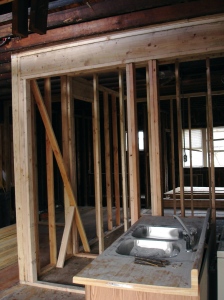
Standing in the front room looking through the studs to the second guest room and master at the back of the house

The master bath and closet is framed out as well.

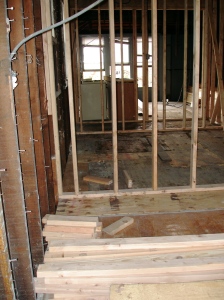
Master closet frame-out

View from back of master looking at closet through to front of house

Share